recode-fa23
Digital Ocean Droplets
Setting up an account
If you haven’t already, create a free account over at Digital Ocean.
They regularly give away $200 in free credits and have additional features available to students - Referral Link. You’ll have to put down a valid payment method first, but there’s no need to worry. They’re a totally legit company that I have used for years. 👍🏼
Droplets
A droplet is a remote computer or virtual machine (VM for short). It runs in the cloud and has access to the internet. Theirs run on an OS called Ubuntu which is a Linux Operating system. Save some minor differences, it will behave much like the Unix (Mac) and Git Bash (Windows) terminals we have been using.
Why are we using Digital Ocean, you might ask?
Well, other web apps like Glitch, Heroku and Replit do not allow you full control over your server applications and/or require you to “boost” them to keep them accessible 24/7. Digital Ocean droplets give you this control straight away. It’s a bit less user-friendly up front, but the tools are much more robust and you’ll learn valuable lessons along the way.
Setting up a Droplet
Generating an API Token
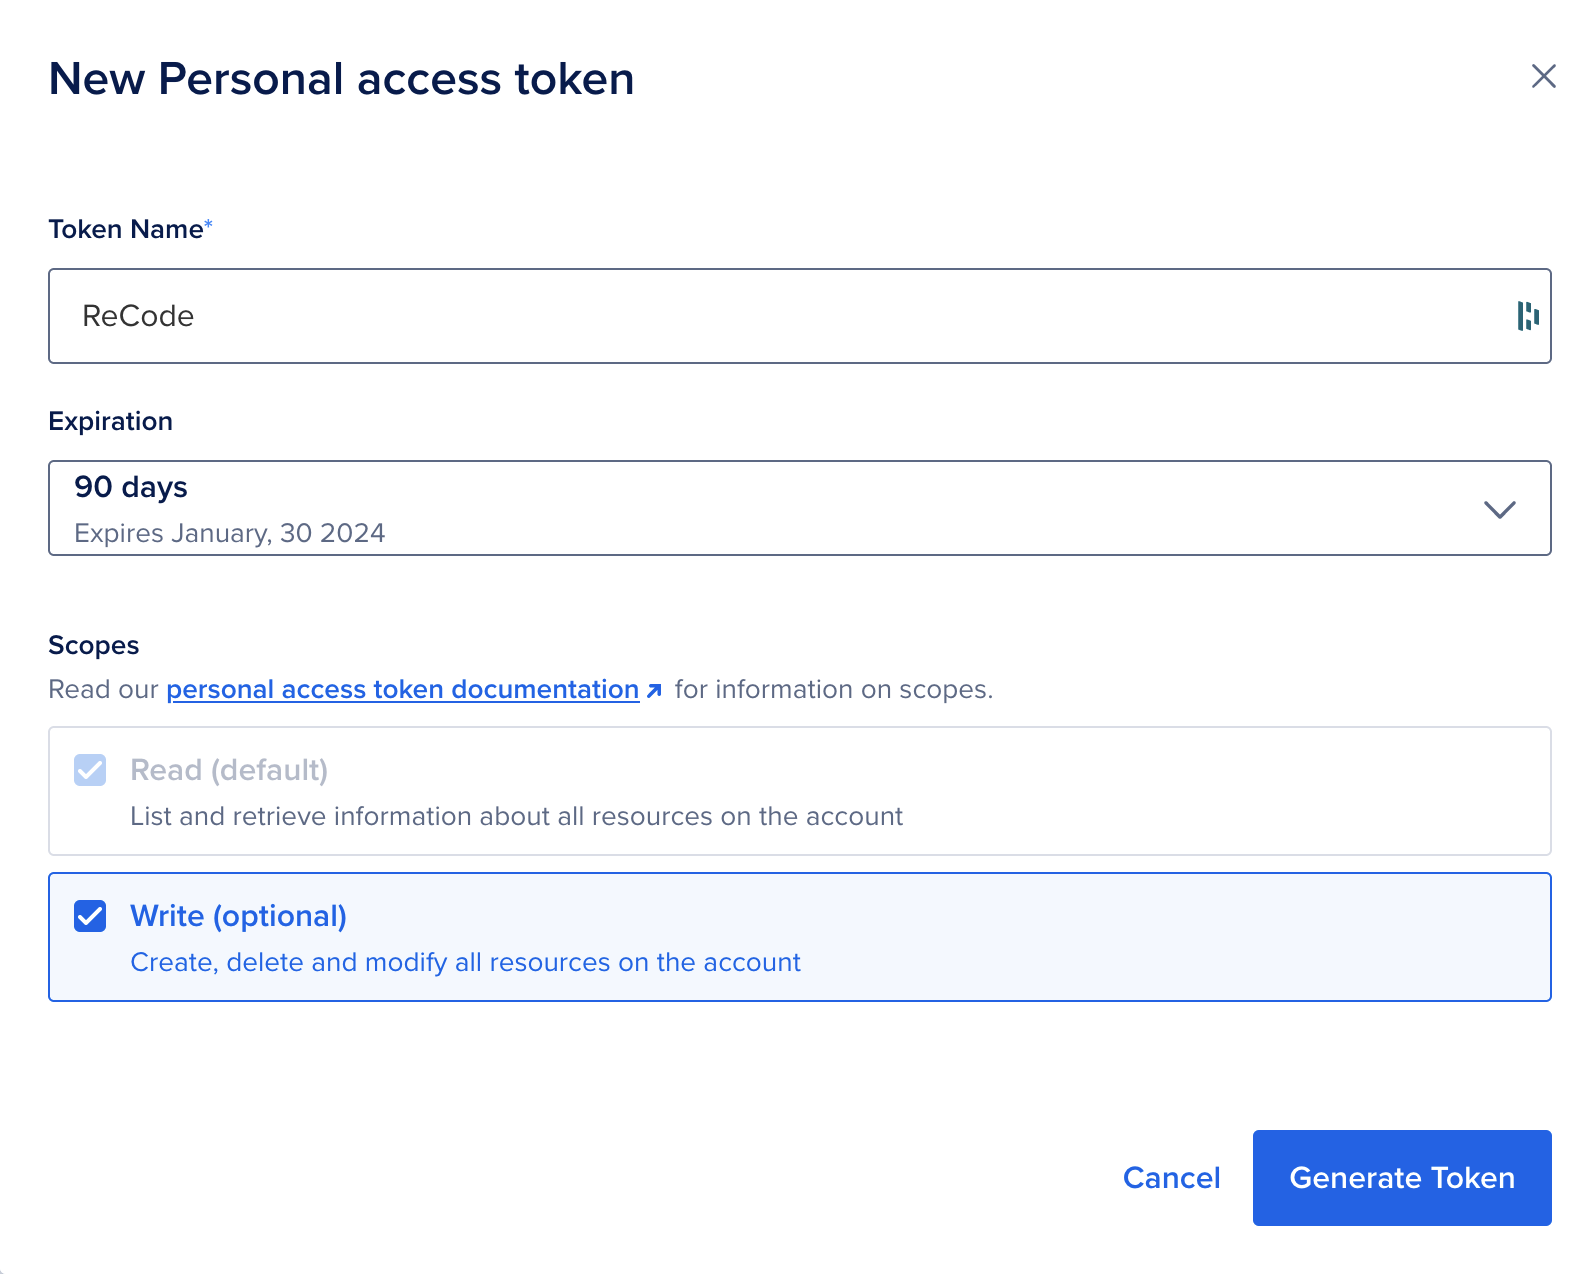
You’ll first need to generate a new personal access token.
- Go to the API tab in your console here,
- Make sure that the Write box is checked ☑️ and click Generate.
- Copy this token as it will not be shown again.
Using your API Token
Now, we will use the export command in our local terminal like so:
export TOKEN=YOUR_API_TOKEN
…where YOUR_API_TOKEN is the API token that you just created. This will create a local environment variable that we will call in the next command we run below.
Via Command Line
We can now create the droplet using curl command which will make an HTTP call to Digital Ocean’s Droplet API.
When we run this lengthy curl command below, the TOKEN variable with our API key will be included from the local environment, using the special $ syntax, i.e. $TOKEN. Just copy/paste the command into your terminal and hit ENTER.
curl -X POST -H 'Content-Type: application/json' \
    -H 'Authorization: Bearer '$TOKEN'' \
    -d '{"name":"recode",
        "size":"s-1vcpu-512mb-10gb",
        "region":"nyc1",
        "image":"ubuntu-23-10-x64",
        "monitoring":true}' \
    "https://api.digitalocean.com/v2/droplets"
If successful, the output of this command will be a lengthy JSON object:
{"droplet":{"id":382884684,"name":"recode","memory":512,"vcpus":1, ...
Here’s an example the full output.
You will also get an email with the details of your Droplet including the IP address and password. You will need the password when you log in to the Droplet for the first time via the online console/terminal.
If there is an error, check that your API key is correct. You can do this by typing
printenv | grep TOKEN
# outputs the value of the TOKEN variable
If the output of TOKEN does not match your API key, reassign the TOKEN variable again, i.e. export TOKEN=YOUR_API_TOKEN.
Accessing our Droplet
For now, we will use the Droplet Console that Digital Ocean provides. This saves us from having to set up SSH, which we will do later when we get into running our own web servers.
Click on Launch Droplet Console. You’ll then be prompted to put in your Droplet password that was emailed to you. And then you will be asked to create a new password.
Using our Droplet
We’ll need to install Node.js and npm straight away. For this, we’ll use apt. You can think of apt as just the npm for Ubuntu. If you get any pop-ups, you can hit enter or type ‘Y’ for yes.
apt install nodejs
… and then.
apt install npm
Then install pm2 globally, like we did on our local machine.
npm install -g pm2
Moving local code to your Droplet
Ignoring .env file
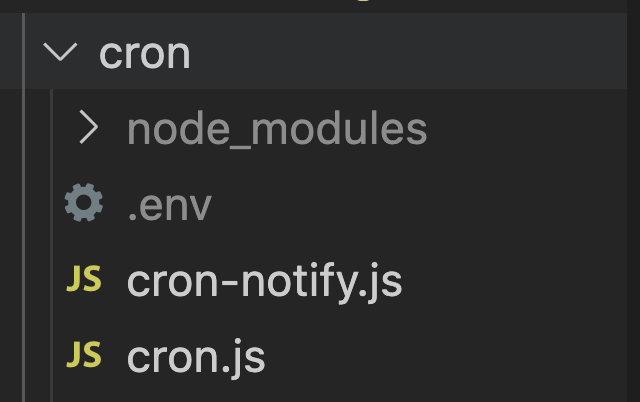
Before you commit your local changes using Github Destkop, you’ll want to first make sure that you don’t commit your .env file, which has your Pushover API tokens. To do this, you add your .env file to the .gitignore file.
First, make sure you have a .gitignore file in the folder with your code and that is has the .env file listed. Here is an example .gitignore file from the notify-app example repo.
If done properly, the .env file will be grayed out in VS Code. Remember to save your .gitignore file for the changes to take effect.
Once that is taken care of, commit your local changes using Github Desktop and push them to your Github repo. Then you can open this repo on Github and use the URL in the next step when we clone the repository in our droplet using the command line.
The repo you are working with must be a PUBLIC repo in order to be cloned in the next step!
Cloning a Github repository
Even though the droplet is connected to the web, we can’t use a web browser or a desktop app like Github Desktop to get our code onto it. But we can use the command line and git to download an exact copy of the code onto the droplet. This is a process called ‘cloning’ the repo.
To clone a repo, we simply use the git clone command and provide a URL as the next argument, e.g.:
git clone https://github.com/username/repo
… where username and repo in the URL are replaced by your username and the repo name you want to clone. So making the proper substitutions in the URL, clone the repo to your droplet using the command above.
When you clone a repo, a new folder is made with the name of the repo. You can see proof of this by running the ls command and seeing the name of your repo.
Then do the following in your droplet:
cdinto the new repo foldernpm installthe dependencies- Add a
.envfile that matches your local.envfile-
Use the
nanotext editor to create the file like so:nano .env -
Then paste in your credentials from your local
.envfile and follow the instructions at the bottom of the editor to save and exit.
-
- Start the app with
pm2 startand the script name you were working with.
Managing the pm2 process
Remember that pm2 will remove the .js from your app name by default.
You can check the status of the all apps at any time by typing:
pm2 status
To stop or restart an app, type:
pm2 stop <app name> or pm2 restart <app name>
To remove an app from pm2, type:
pm2 delete <app name>
To check the logs, type (errors are in red):
pm2 logs
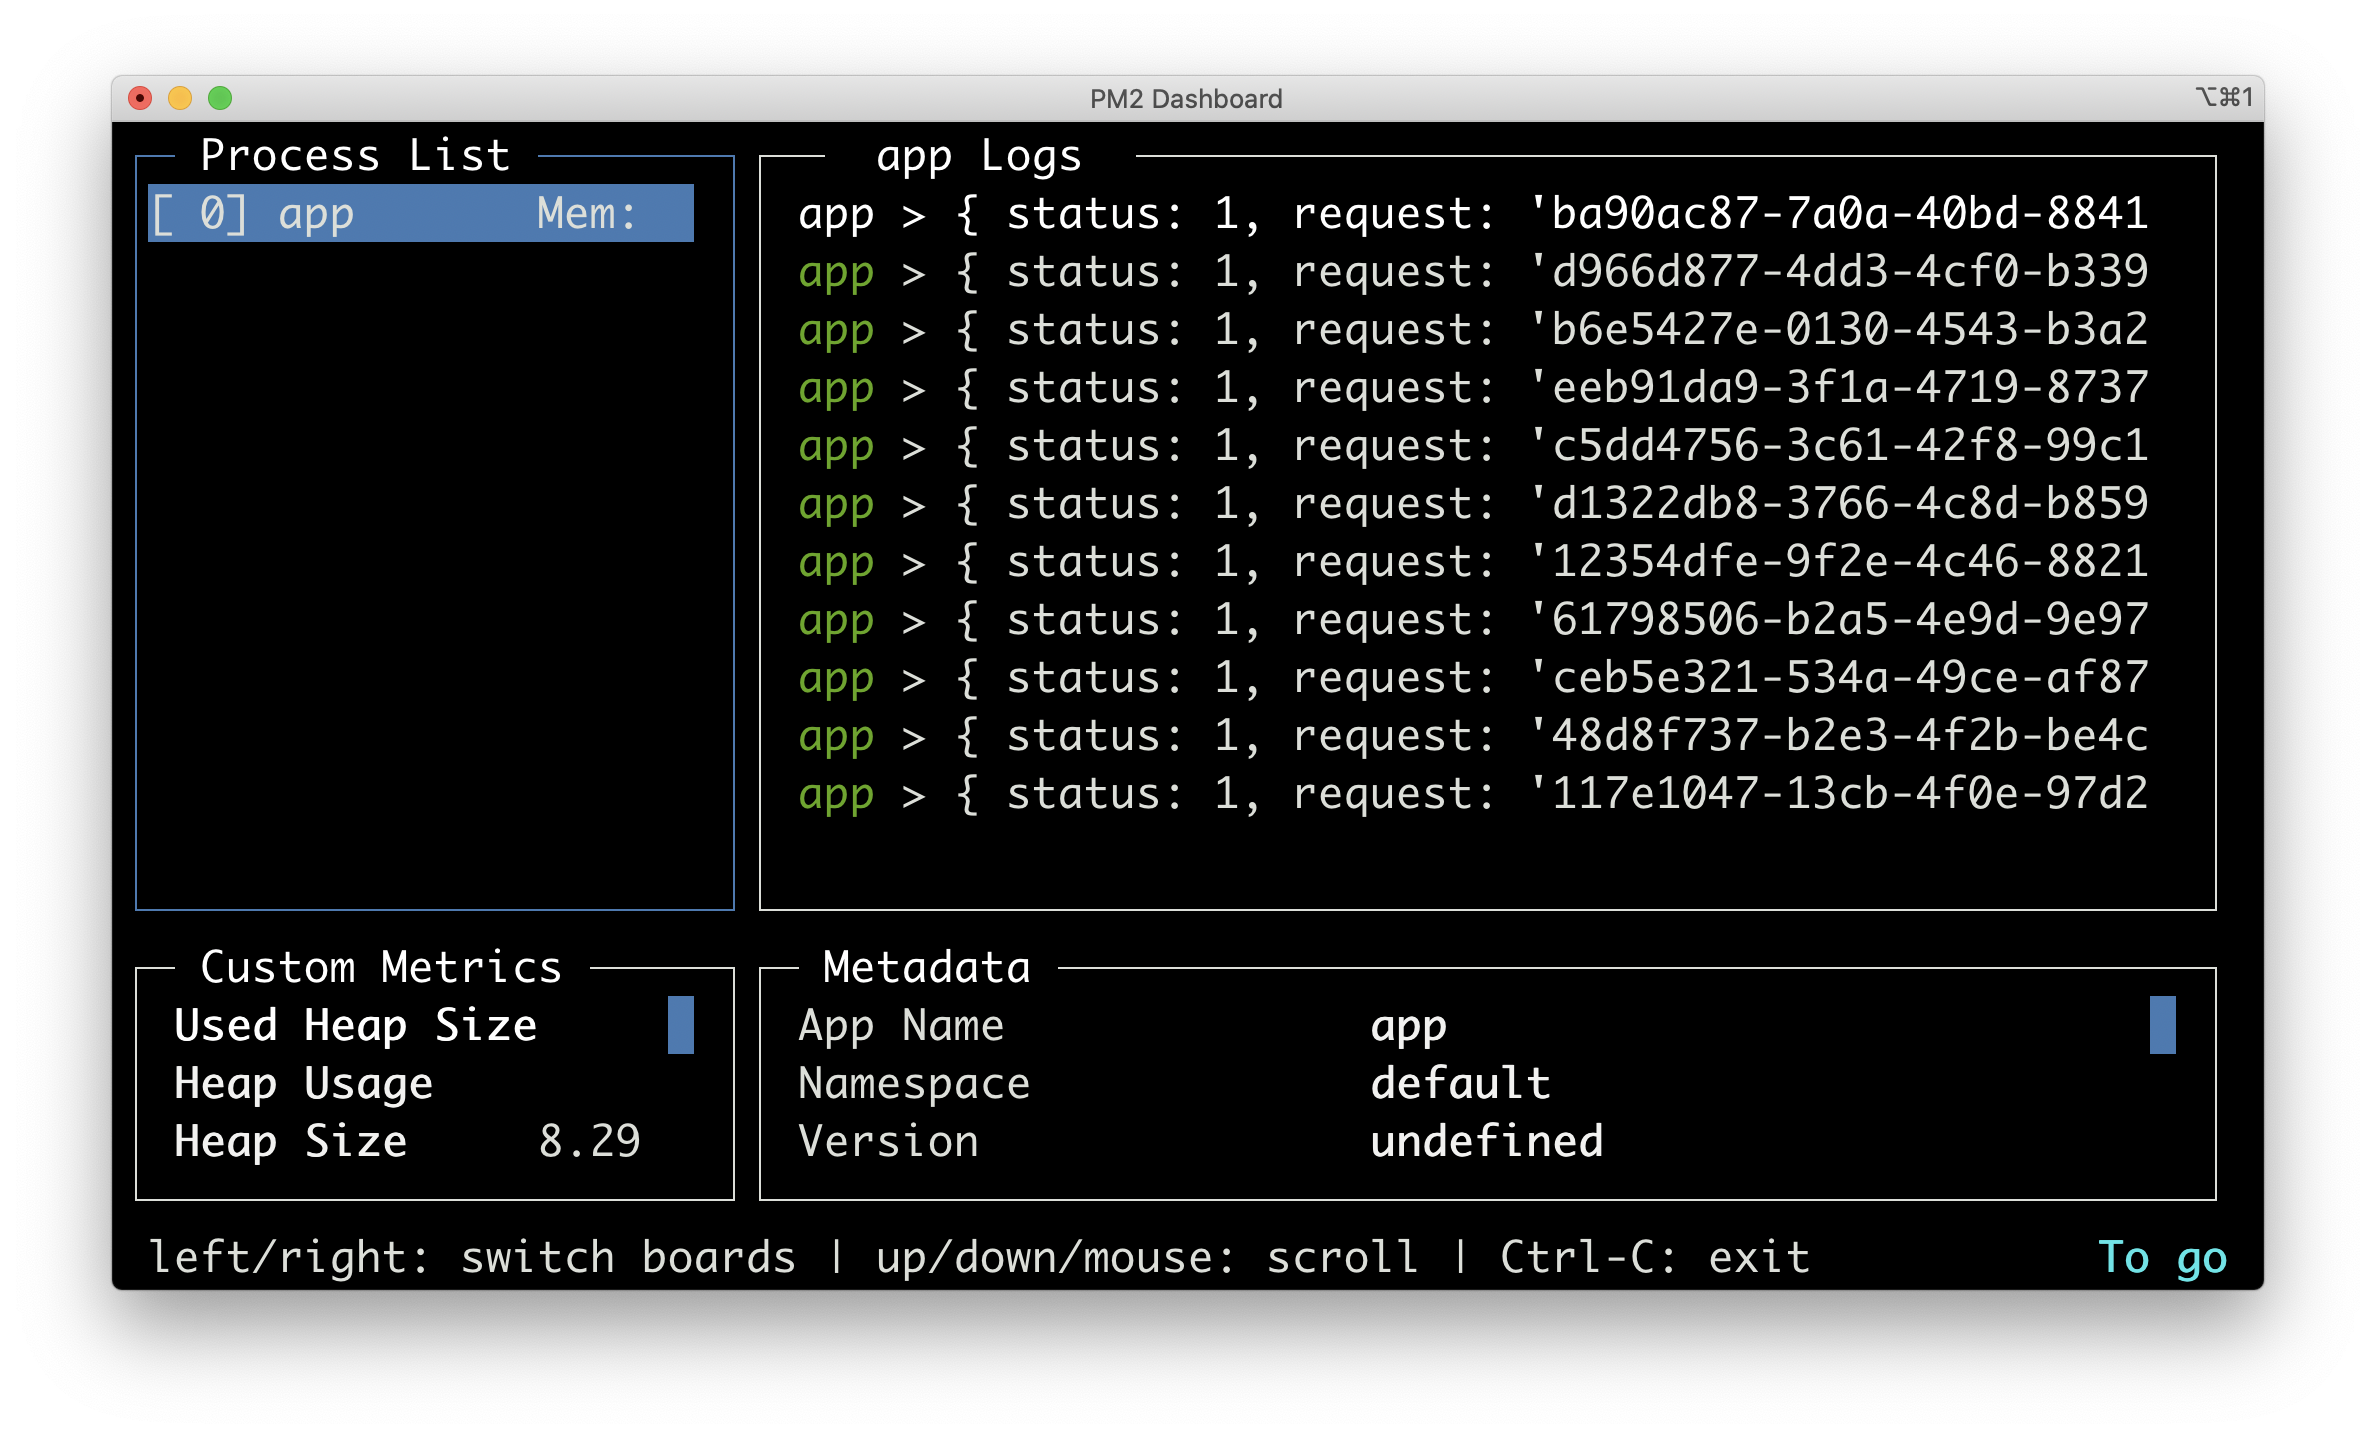
For a real-time monitoring, try:
pm2 monit
Making Changes
To make changes to the app, you have to take a few things into consideration. Firstly, the code has already been compiled and is being managed and run by pm2. So any changes that you make will not affect the process that pm2 is managing, similar to how the web browser won’t show changes until refreshed. You have to stop the current pm2 process and restart it in order for any changes to take effect.
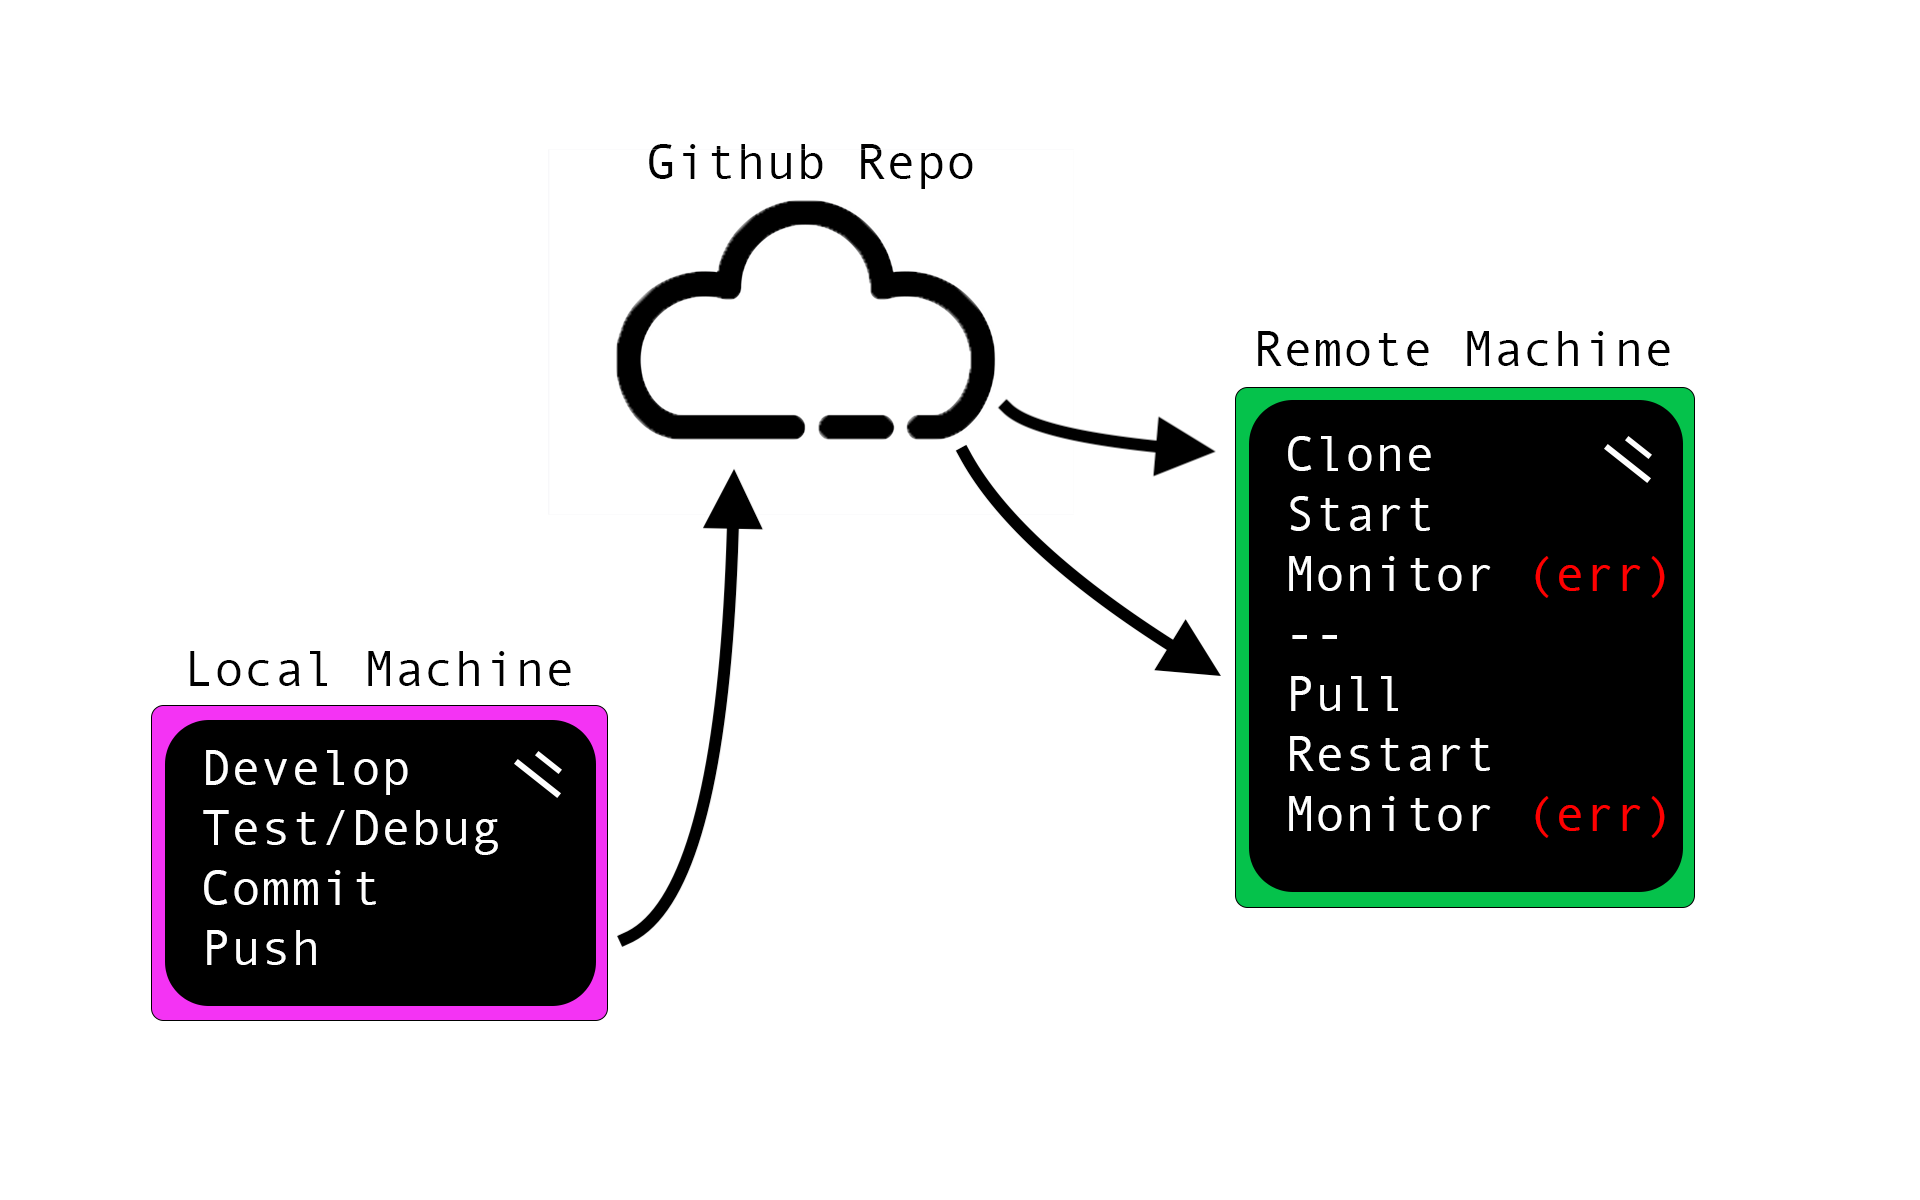
The process for your droplet should go as follows:
- ON YOUR LOCAL MACHINE:
- Develop
- Test and Debug
- Commit your changes
- Push the working code to Github
- ON YOUR REMOTE MACHINE:
- Clone the remote repo (
git clone https://github.com/username/repo) - Install your dependencies
- Deploy your app
- Monitor the logs for errors
- Pull new changes into your repo (
git pull) - Restart your app
- Pull new changes into your repo (
- Clone the remote repo (
We always follow this process - develop locally / pull remotely - because it’s much easier to test and debug locally than it is on a remote machine. And Git/Github makes this so much more convenient for us!
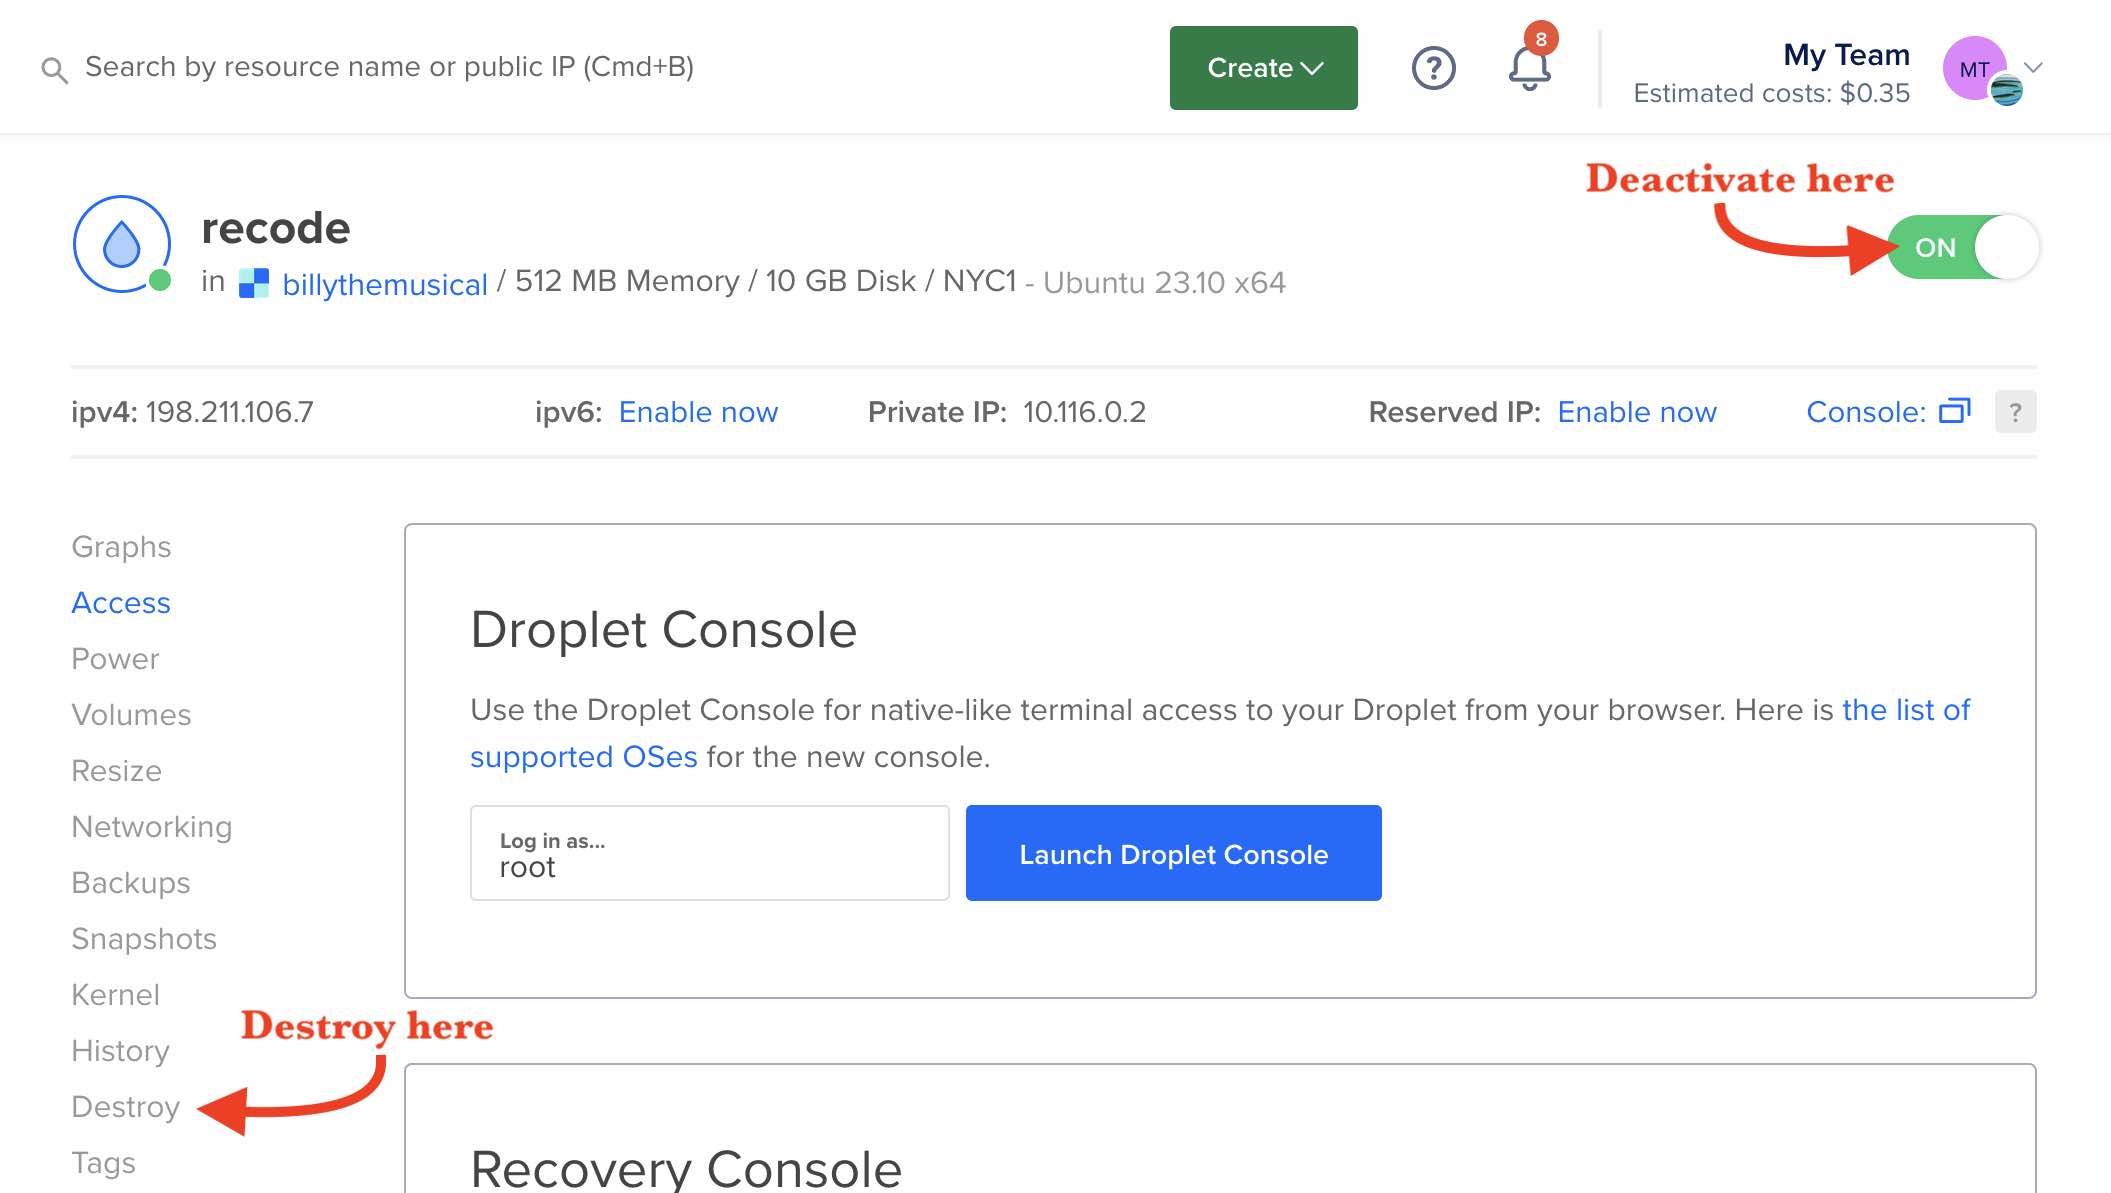
Deactivating or Deleting a Droplet
Droplets can be deactivated or deleted at any time. Deactivating is helpful if you have a runaway process or if the droplet is under attack 😱. Droplets will still accrue charges though if deactivated. Deactivating a droplet will maintain all of its files and configurations while deleting it will erase it from existence entirely (and cease to charge your account).
To deactivate the droplet, simply toggle the ON switch in the upper right of the droplet console. To delete the droplet, click on “Destroy” from the options on the left and proceed with the instructions.